Creating new pages
To create a new page, we will:
- Add a new route
- Add a controller
- Create and action
- Define the view shown to the users
To understand this suite of actions, take a quick look at The Rails framework diagram. We are making sure we allow Rails to follow the full path, from request to response.

Adding a route
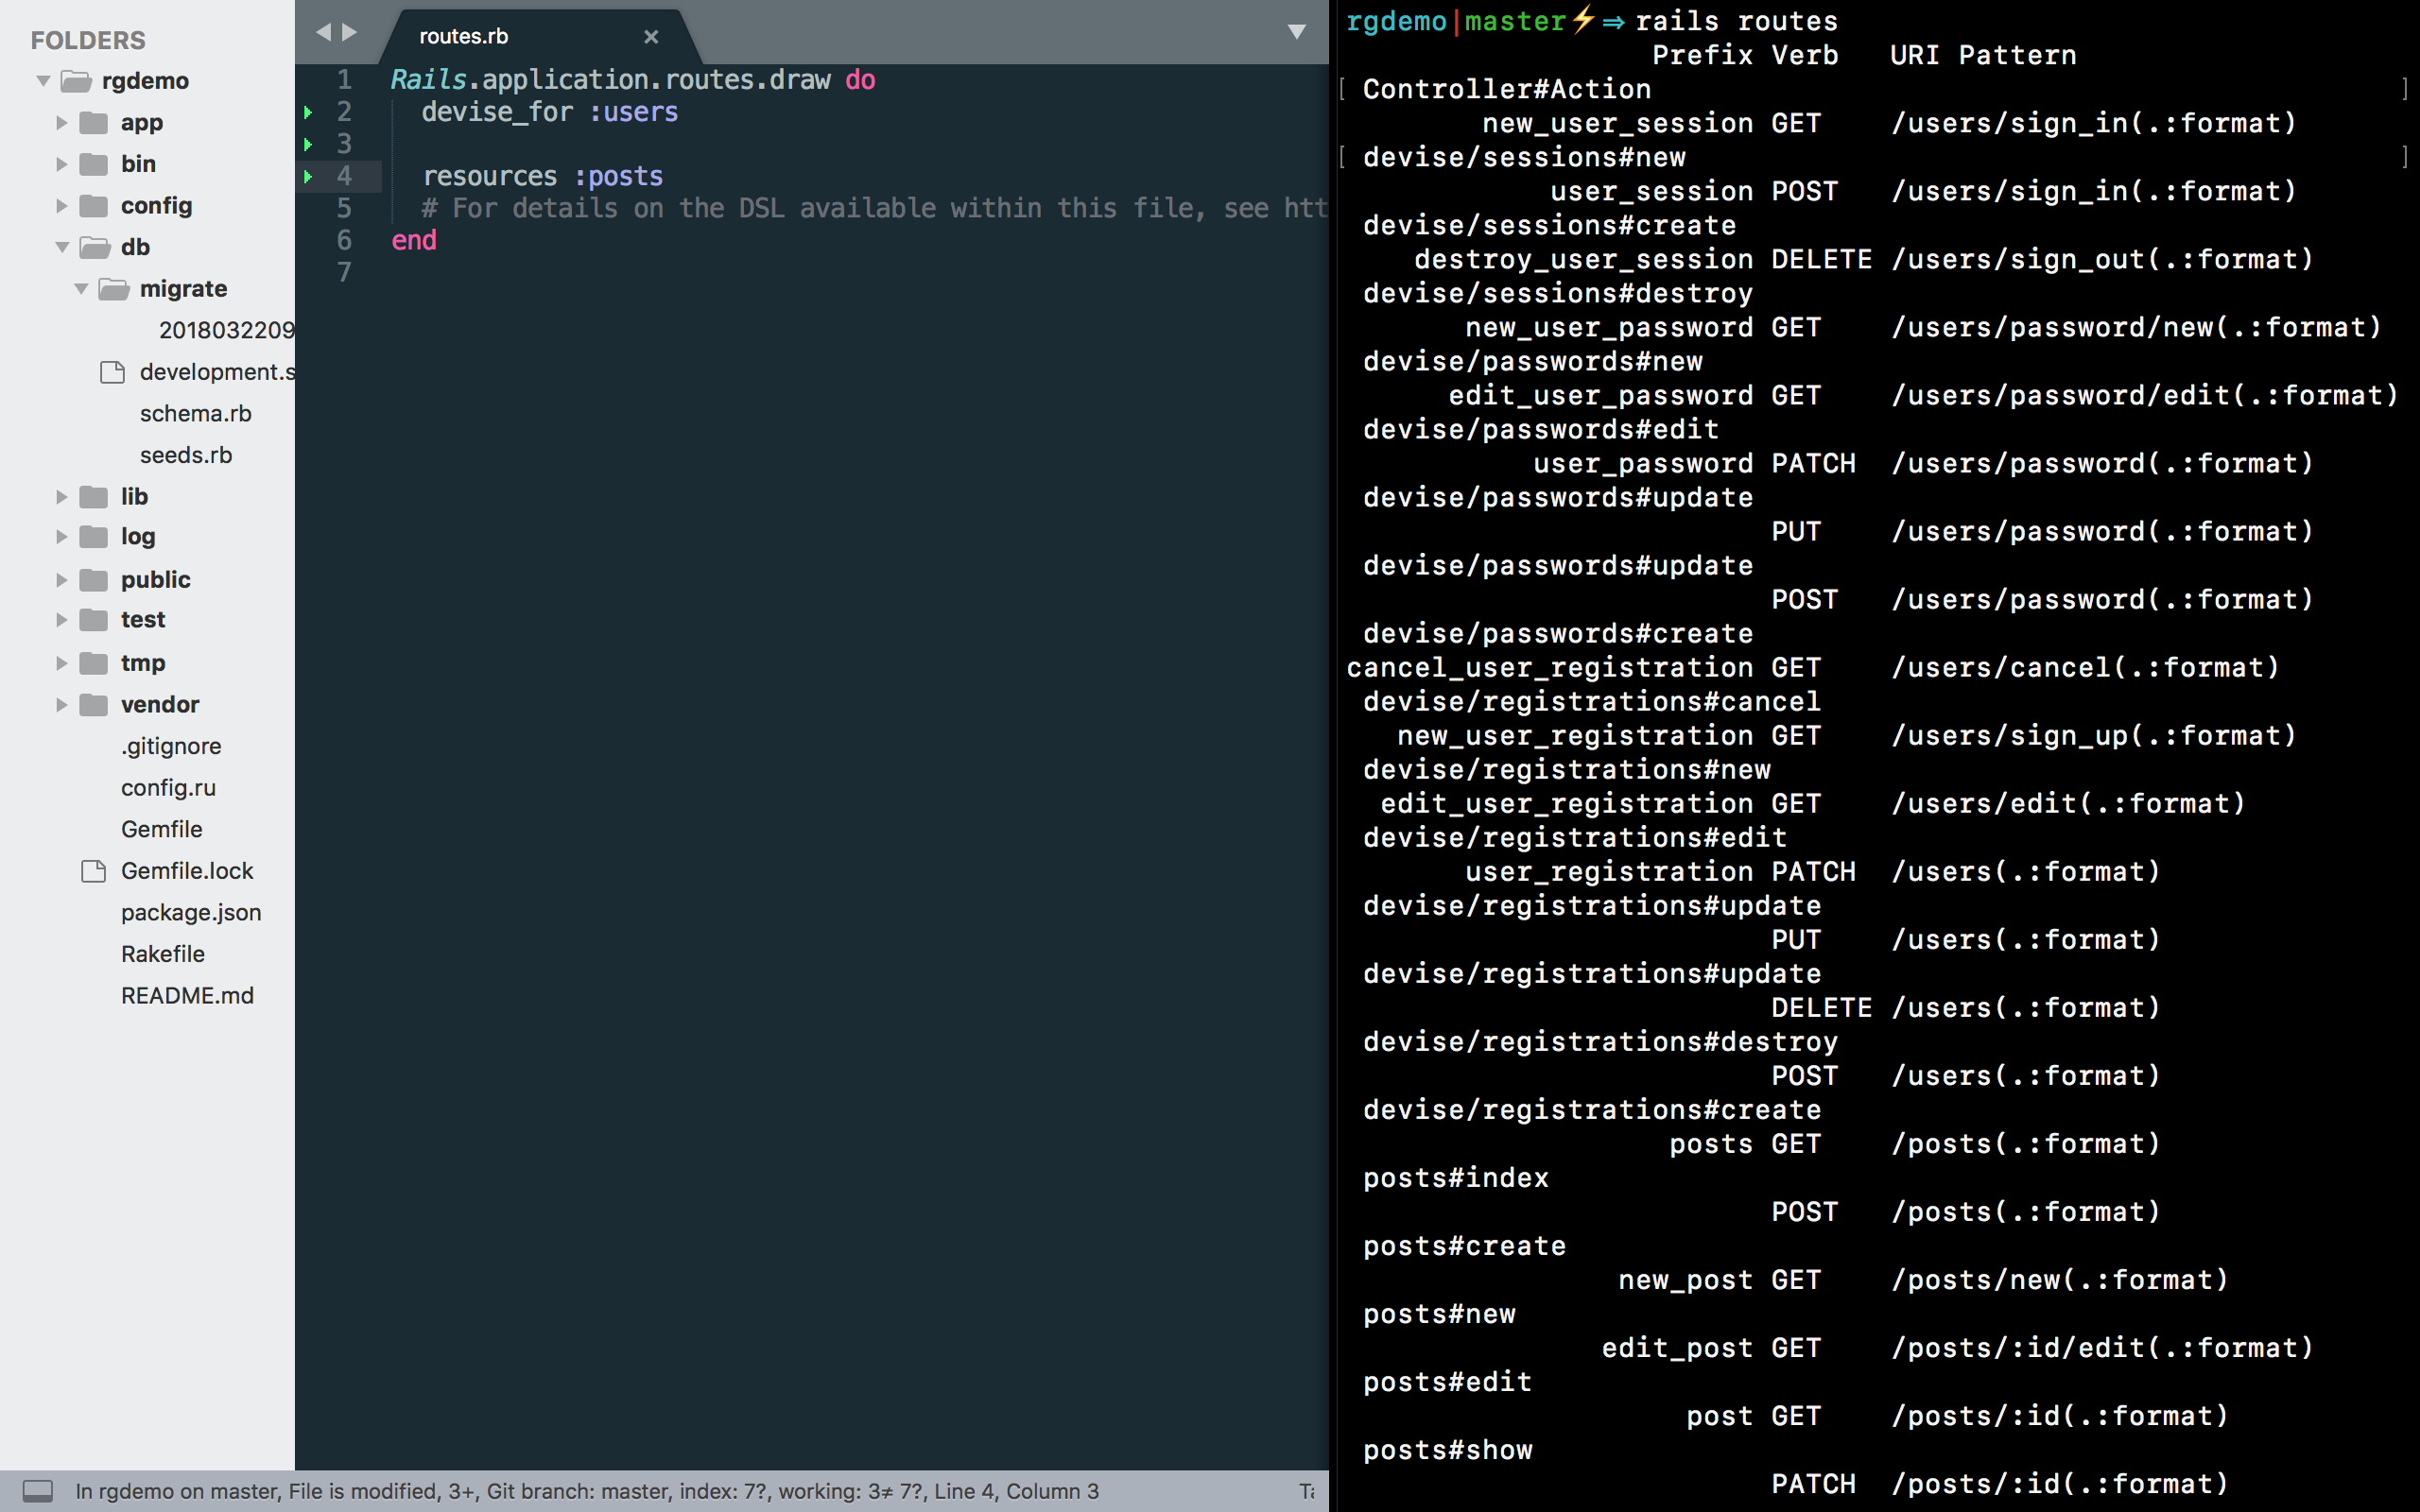
You can add routes by changing the file config/routes.rb.
If you open it now you can see that Devise has already added a route for your app's users on the second line with the code:
devise_for :users
To create a new route that will redirect your users to the posts on your app type in a new line:
resources :posts
and save the file. To examine existing routes, type in the terminal:
$ rails routes

Adding a controller
Now that we have a route you could try to check all the posts you now have in your system. (which is exactly 0, more will be added later).
Start the rails server. In your browser go to
localhost:3000/posts
You should see an error, both in the browser and in the terminal.

This is supposed to happen, since the controller for the posts route has not yet been set up.
To create the controller go to /app/controllers and create the file posts_controller.rb. Type in it:
class PostsController < ApplicationController
end
and save.
The controller part is done.
Adding an action
If you try again loading localhost:3000/posts you will get another error, about a missing action index.

For the path /posts the controller action is index (as noted by the controller#action).

We did not create any action called index in our controller, so we have to do this right now! In the existing file /app/controllers/posts_controller.rb define a new action, inside the PostsController code block:
class PostsController < ApplicationController
  def index
  end
end
Now go back to the browser and refresh the page. You will see another error, but this time it will refer to a missing view for the existing controller.

Showing a view to the user
Each time an action is run, a specific view with the same name has to be shown to the user.
So for the index action we need an index view. Go to app/views and create a new folder called posts (since we’re using a posts_controller), and inside this folder create a new file called index.html.erb.
.html.erb is the file extension. The .html tells us this is an HTML file and .erb, as we will discover later, tells us that this HTML file can have some Ruby code inside it.
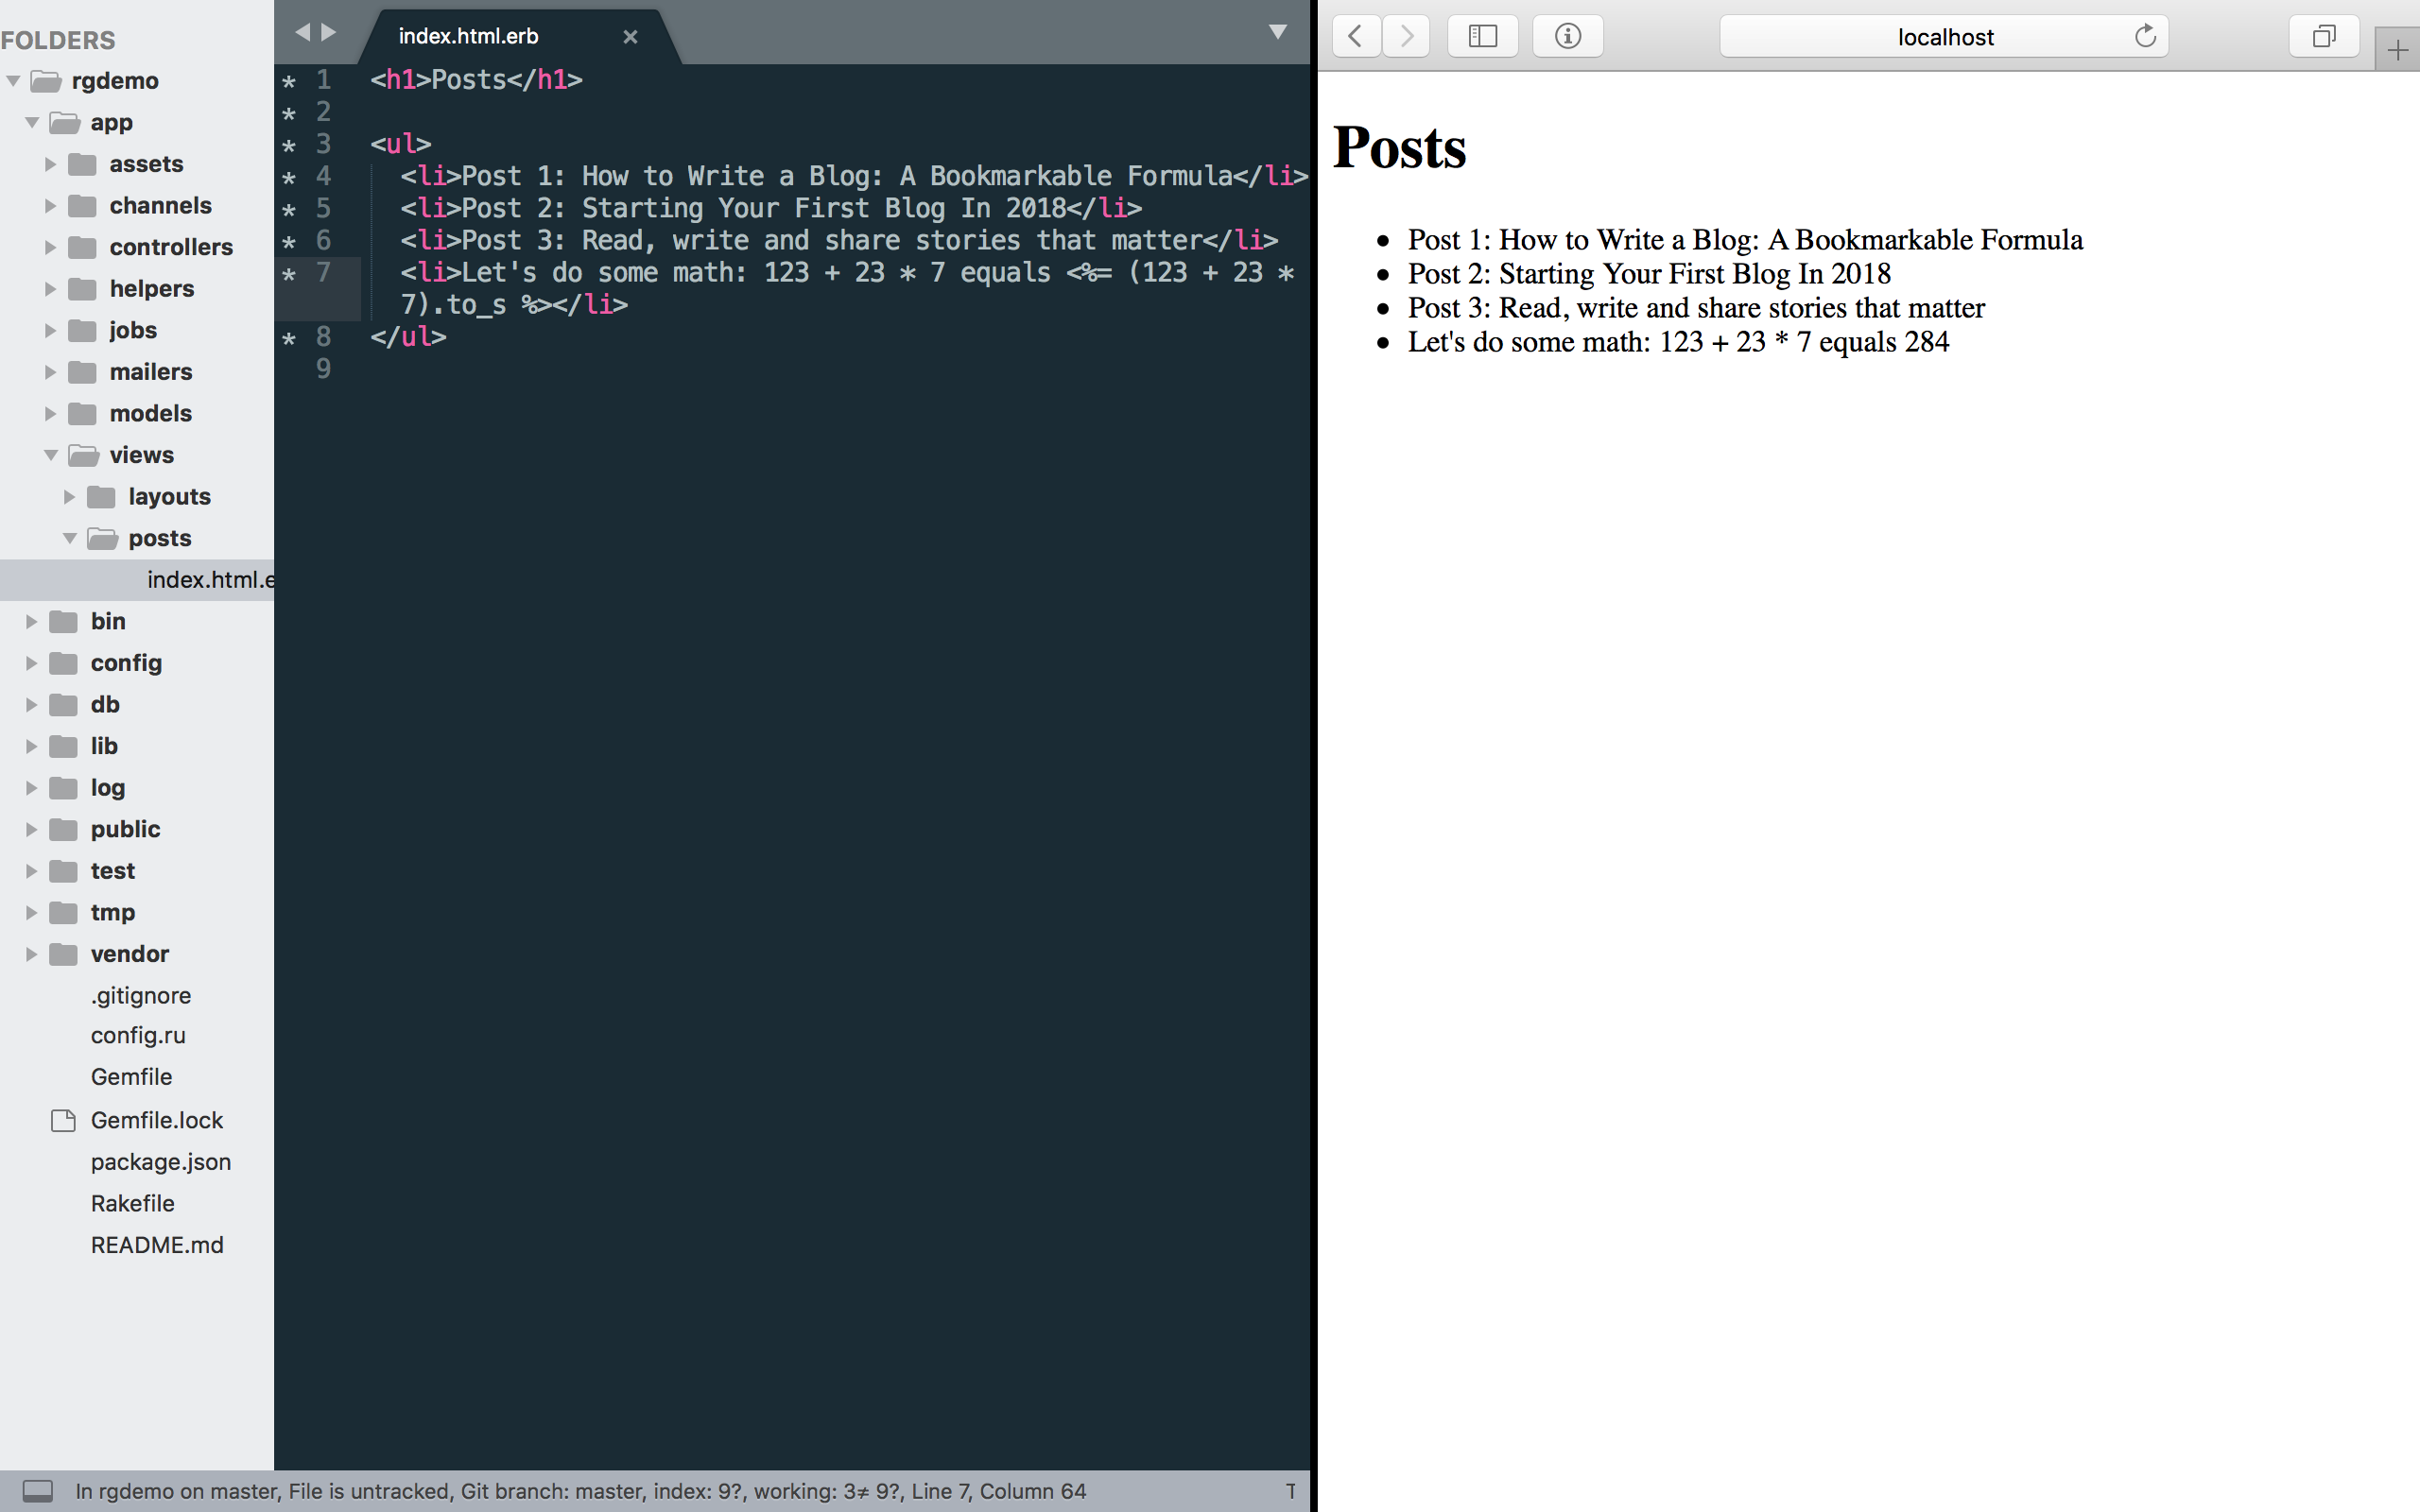
Type the following code in the freshly created app/views/posts/index.html.erb:
<h1>Posts</h1>
<ul>
    <li>Post 1: How to Write a Blog: A Bookmarkable Formula</li>
    <li>Post 2: Starting Your First Blog In 2018R</li>
    <li>Post 3: Read, write and share stories that matter</li>
</ul>
Save and go check in the browser the page at localhost:3000/posts

Oh, wow!
What the code did is it made a heading of size 1 from the text between <h1> and </h1>. It also made an unordered list with everything between <ul> and </ul>. Each list items was written between the <li> and </li> tags.
This is standard HTML notation, and it helps our browser understand how to display various items on the webpage:
- Tags that start anything, say a title, are written as
<TAG> - To show the end, the tag is written as
</TAG>.
Using ERB inside the view
You may have noticed we didn't name the page we wanted to submit to the user index.html. The index.html part is what the user will actually see.
The file is named index.html.erb, where erb stands for embedded Ruby, and simply means that the html page will also have some Ruby code inside it.
To insert Ruby code in an html page you should type it as <% CODE %>, or <%= CODE %>, where CODE is your Ruby code.
• The first command, <% CODE %> runs some Ruby code but doesn’t return anything. For example, <% end %> will end a block of Ruby commands.
• The second one, <%= CODE %> will execute the code inside and return something in its place in the html. For example, <%= 123 + 23 * 7 %> will write 284 on the page instead of the code.
